
Trikke Trainer Academy
RIDING PRE-REQUISITES & SIGN UP
REQUIREMENTS
In order to apply for the Trikke Trainer Program, applicants must first be proficient in the basic operation of a carving vehicle. Please be prepared to demonstrate the following capabilities:
- Start from a dead stop without touching foot to ground
- Ride smoothly and easily
- Ride for up to ten miles on a varied course in under two hours.
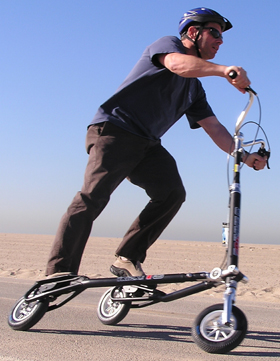
There are several different techniques and styles of propulsion for a Trikke Carving Vehicle, many of which are necessary for proficient and competent riding. Before applying for the Trikke Trainer Program, you should review, understand, and attempt to ride (or even master) the following techniques:
TRIKKE RIDING ASANAS (Named techniques)
"Nice and Easy"
-Riding
so that it looks effortless. Without
punching with your arms or exaggerating your weight shift from side to side,
simply get in tune with the physics and turning left and right while leaning
the bars into each turn. Get into the flow and feel the ease.
“Punching the Bag”
-Punching
the handlebar with the outside arm for acceleration through each turn. Keep the inside arm strong to resist the
handlebar’s reaction to the outside arm’s punching movement. This is a very important component to hill
climbing and great for building upper body strength.
“Knocking Down The
Door”
-Knocking
the handlebars forward with both arms at once.
Do this as a power thrust while leaning into each turn. This doubles the amount of thrust, while
decreasing the amount of turn. It
creates a more powerful ride in a straighter line.
“The Big Dipper”
-Dipping
the bars as deeply as you can to each side as you make each turn will add speed
and expand a rider’s tool kit. This will
give a rider a better understanding of the power generated from leaning the
steering column from side to side – greatly enhancing their ability to propel.
“The Pry Bar”
-Pulling
up on the outside handgrip to lean the steering column into each turn. Normally,
when one hand pulls up, the other will press down, creating a kind of twisting
motion on the front yoke. It is
especially helpful when in a tight lane like a sidewalk. It is important to make sure that the rider
has sufficient weight on the front wheel, which can lift from the ground,
creating a loss of control. This is also a way to use yet another group of
upper body muscles while riding.
“Tap the Power”
-Powering
up to reach top speed quickly. Sprinting. A rider will need to punch harder and faster with
arms and really push off with each leg as they link quick turns to achieve
acceleration. Upper body effort vs.
Lower body effort will adjust as speed increases. A good exercise is to sprint, then cruise,
sprint, then cruise. Watch for proper
shifting of weight as you shift gears.
“House on Fire”
-Squatting
as you ride – burning your quads. A great exercise to burn quads and calories. Great for the glutes as well. Hold the squat for as long as you can, then
ride in a relaxed manner. This is also a
good challenge for a rider’s balance and stability.
“Kicking It”
-Propelling
by kicking your outside foot forward, around, through the turn. Keep your toes and the balls of your feet
stuck to the platform and “kick” the outside platform forward and through each
turn. Experiment with this method in tight areas where you cannot make large
turns. Can also be
used during hill climbing. Remember to throw your outside hip and knee
forward with each kick. A rider must
also shift their weight appropriately, and mind their center of gravity based
on how tight they turn.
“Pump it Up”
-Really
pumping your legs on each turn to travel quickly. This technique helps you understand the
power of pumping aggressively with the outside leg on each turn. If you have
the rest of the flow under control, this will drive you even faster.
NOTE; The better you understand and can demonstrate the above riding techniques, the more productive your visit to the Trikke Academy will be, and the higher the level of “Trikke Trainer Certification”. (i.e. Level 1, 2 or 3).